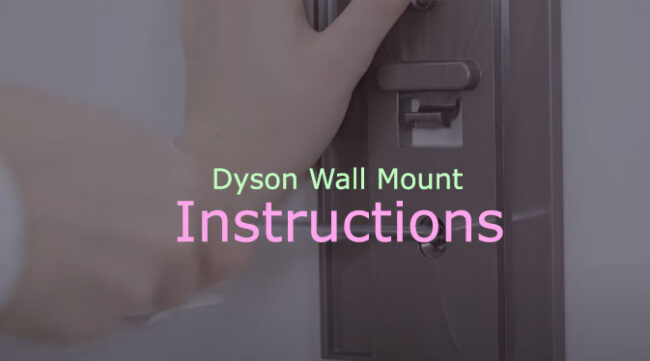
Talking about Dyson Wall Mount instructions, we have to consider several models in the market.
If you look at the market conditions, you may find the model names Dyson V7, Dyson V8, Dyson V10, and similar.
Now inside the instructions, we have to talk about each of the models because several users use different models and seek instructions.
But the good thing is there are functional similarities among the models. So, we will place the most appropriate instructions that will be functional for almost all the models.
And the point to be noted here is the Dyson V7 mount instruction will apply to all the other Dyson models.
Without any further delay, let’s jump into the main theme.
Dyson Wall Mount Instructions – Follow the steps:
The steps will be very random, so make sure you don’t miss any part.
But if you are an expert or too impatient to read through it all, jump to rock bottom; we will be summarizing the steps for you people.
For the whole setup and installation, you will need the following;
- Dyson wall mount (Recommended)
- Screws
- Charger
- Drill
- Screwdriver
- Wall plugs
- Pencil
- Level
- Measuring Tape
Step 1- Selecting Proper Place
The very first thing you need to do is, fix a proper place for mounting. Determining this is highly important because,
- You cannot change this very often.
- Fluctuating the mount may damage the machine in several ways.
The diameter is 2 x 4 studs on the surface of your wall. You will need two Labrico adjuster brackets. They will be set up on top of the other one.
After you have tightened the screws, you may need more anchor screws to mount multiple devices Though they are very much optional.
Though the placement is completely up to the user’s choice, we can suggest some popular positions as;
- Near a socket.
- On the right height from the ground.
- Not at the corner of the wall.
- Not in a very visible area.
Step 2- Selecting Mounting Position
Secondly, you need to select how you are going to select where you will place the device. On every intact pack, you will find the manual of the device.
But users often make a mistake by not reading it properly.
So, make sure that you read the whole manual and mounting instructions. Most of the time, these are located on the back of your Dyson Vacuum.
You can use a wall mount on your Dyson V7. In that case, reading the manual is highly important to be clear of the mounting height. Also, you should know that the v8 wall mount is completely compatible with Dyson V7 and V8 models.
Step 3- Check Toolkit and Necessary Stuff
Afterward, you must check the package and find the necessary accessories. It comes with countersunk screws and wood screws.
When you are beginning to start the setup and installation process, make sure you have disconnected the power from the machine, removed the cord, and turned the machine off.
Otherwise, you may face a huge risk of getting an electric shock.
In the new dock;
- Improved Dust Bin Release Tab
- Battery Indicator
- Power Mode Button
A quick precaution about the fact is that some users randomly use third-party mounting kits. Those are cheap and, in some cases, may damage your vacuum body.
So, it is always recommended to use an authentic Dyson Mounting Kit.
Step 4 – Placing the Dock
In the beginning, you have to remove the dustbin from its place. Take a screwdriver and unscrew the vacuum to set it with the wall mount.
Screw the charger cord in a suitable place on the wall. Then the Dyson V8 Doc has to be placed and set up on the wall properly. Then you can easily mount your Dyson V7 on the dock.
The fact is, the instruction of the machine will lead you to the mounting process. You need to read it carefully. Also, the manual and instruction book are kind of similar.
So, reading any of those may help you till the end. But device models and generations may differ sometimes, so make sure you are using and getting ideas from the same generation of products.
Step 5 – Post Installation
Since you have gone so far, the mounting process is done. But there are some other necessary steps you need to take to make it completely usable.
After the installation, you must plug the vacuum cleaner through the station. The next step is to set up the wall mount bracket on the mounting arena. The base for your Dyson V8 will be a thick wood plank platform.
After doing it all, it is time to place and install the main unit.
As you have been watching, the Dyson V7 is the word we have repeatedly repeated. The reason is that the Dyson V7 mount instruction and machine functionalities are compatible with almost all the models. That makes sense, right?
And the last thing you need to keep in mind is that before mounting the vacuum, the charger should be plugged in.
Last but not in the box, you may ask, why are you going to install the wall mount?
The reasons could be;
- You are not willing to drill your wall.
- It would be best if you had a sleek hassle-free setup in your house.
- You don’t want to destroy your classy home setup.
No more conclusion is needed. You are now completely aware of the ideas about how to mount your Dyson vacuum of any model properly.
Though models may vary from generation to generation, so many of these have similar functionalities very much. So, all the steps, instructions, tips/tricks, and precautions we have dropped can be applied to all those models in the market.
So, you may be a user of Dyson V7, V8, V10, V11, or V15; you can apply the instructions to mount your Dyson vacuum in your room.
Dyson v15 Docking station installation:
But if you are still confused, we are placing the instructions shortly for you here;
- Connect the charging cable properly to the back of the wall holder.
- Connect the end of the cable to the front (Make sure you hear the click sound).
- At the correct height, put the two screws into the holes.
- Set the wall plugs to those holes.
- Set up the wall brackets with the two screws against the indicated position.
- Push the bracket to the plate until it clicks.
- The last step is to plug in the charger and connect the power through the machine.
Related Articles:
- Dyson vacuum flashing red light – (solved)
- Dyson vacuum troubleshooting guide
- Why my Dyson vacuum is not charging
- Dyson vs Rainbow vacuum – Comparison

Hi, This is George. Founder Of Vacuumist.com. Completed my graduation in Bachelor of Business Administration. Proud father of two lovely baby girls. Reviewing home appliances is my passion. Developing this blog to update and publish my recent reviews and research. Stay in touch.