Getting your floors squeaky clean is euphoric to some, and to others, well, it’s just a plain necessity.
Whichever it may be, a steam mop can be quite satisfying due to its splendid cleaning outcomes.
And when it comes to steam mops, many of you are surely acquainted with the Shark Steam Mop. It not only delivers smooth and effortless performance, but its sleek designs are also a plus!
This world-class manufacturer has won millions of hearts with its steam mop range and continues to do so.
But what about the times when your Shark Steam Mop starts to act up after years of cleaning? Well, it’s pretty obvious that an electronic machine to malfunction once it has provided service for years at a stretch.
However, there’s nothing to worry about, as you can easily troubleshoot them at home.
So, let’s go ahead and take a look at the quick fixes when your Shark Steam stops producing steam.
Let’s check How to Disassemble a shark streamer first,
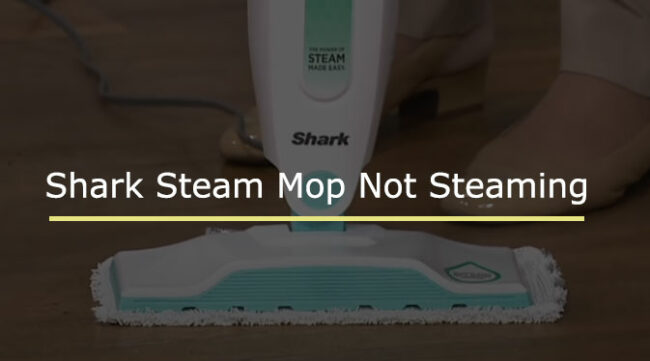
Shark Steam Mop Not Steaming – DIY Troubleshooting
No Water in The Tank
Now, this might sound childish and silly to some but trust us. Many users tend to make this mistake when using their steam mop.
If your steam cleaner does not have any water left in the tank, it’ll stop producing steam right away. To ensure this isn’t the issue, check the water tank and fill it to the brim if needed.
However, always make sure that you don’t plug in your cleaner tank when it’s empty because this will only do damage to the internal parts of your machine. And whenever this occurs, your Shark steam mop will lose its warranty too.
Internal Leakage May Be the Cause
When you plug in and turn on the Shark steam mop, pressure buildup causes the machine to release steam and thus clean the surfaces.
But often, this pressure system gets leaky. Under such circumstances, steam won’t be released from the machine’s nozzle. To overcome this error, check the underlying cause, which, more often than ever, is the bottom cap.
To do so, there are a few things you’ll have to follow-
- Fill the cleaner tank up to max capacity
- Once this is done, inspect whether the bottom cap is put into the right place firm enough.
- Additionally, check whether the cap is tightly fit
- In case the machine’s bottom cap seems to be loosened up, or it doesn’t sit quite right in position, call the Shark support center. Follow their instructions to fix it. If that seems unmanageable, there’s only one solution left- Get it replaced with the help of a professional.
The nozzle is Blocked Up
Another big reason why your Shark steam mop isn’t giving off enough or no steam at all is an obstructed nozzle. But how does it happen?
Whenever you use normal tap water instead of distilled water in the cleaner water tank, the minerals in the water are the root cause.
These minerals follow the steam up to the nozzle and calcify the opening.
End result? The steam nozzle gets blocked, and no steam can get out. Following this, steam buildup inside the machine might also cause further problems, which is detrimental to the Shark steam mop.
However, let’s move on to the quick fixes, shall we? So, there are two simple steps to get done with this issue. One is the manual method, and the other is the DIY at-home method.
Decalcifying the Nozzle: Manual’s Way
To clear up the nozzle full of minerals, there are a few things you’ll need before you start off. So, get the following items ready- cotton swabs (get lots of them to be safe), a screwdriver, paper clips, and a piece of cotton cloth.
Once you’ve collected all these things and are ready to get into the game, take the safety measures first.
For this, turn off your Shark steam mop and unplug it from the power source. Remember, it’s always better to be safe than sorry!
After the safety concerns are considered, it’s time for the real deal. Let the machine cool off for a while if it was used recently.
Then go ahead to remove the water tank and empty it. Now comes the rigorous tasks. Take the cotton swab and remove any residues from the nozzle.
After doing this, you’ll have to move on to the mop’s spray tip. To reach into the spray tip, the screwdriver comes into play. Take it and unscrew the base of your Shark steam mop.
When the base is removed, you’ll notice a small hole where the steam comes out from. Take the paper clip and insert it carefully.
Then just give it a few swirls to clean up the congested spray tip. Just when you’re done with this step, simply put back the tank and secure it firmly in place.
Removing the Jet Calcification: DIY Method
Since the nozzle is now free of mineral accumulation, the next step is to clean the residual blockage inside the jet.
For this, you’ll need two basic ingredients- firstly, a bottle of vinegar and, secondly, distilled water.
Now, with these two items, make a solution in a 1:1 ratio. Then go ahead and pour the mixture into the cleaner’s water tank. After this step is over, leave it overnight and patiently wait.
When you’re up in the morning, the first thing you should do is plug in and turn on the Shark steam mop. Just to be safe with the later steps, take it inside the washroom or simply hold it over the sink.
Now, check the steam settings and put it to the maximum power. Allow it to heat up and produce steam with lots of bursting noises.
Don’t be worried about the loud sound, though; it’s just the decalcified steam coming out!
Given that you’ve drained all the vinegar and water solution out of your steam mop, you’re done with the process and ready to roll.
However, we still have some tips to make your Shark steam mop last longer and provide top-notch service with no hassles. Make sure to follow them!
Tips to Maintain Your Shark Steam Mop
Distilled Water:
Always, I repeat, always use distilled water to fill up your Shark steam mop’s water tank. Unless you do so and use regular water instead, there will be frequent calcifications on the nozzle.
Gradually, the steam cleaner will have reduced performance, and its internal machinery will be on the verge of getting permanently damaged.
Regular Cleaning:
This is something pretty obvious. After every use, try scrubbing the mop inside out to avoid any sediment accumulation.
If that sounds quite impossible due to your hectic schedule, do it at least once or twice a week. Besides, don’t forget to marinate your steam cleaner’s jet with vinegar and water solution once every six weeks. This will make your steam mop last longer than average.
That said, we have reached the end of troubleshooting the Shark steam mop. So, whenever your steam cleaner stops steaming, just follow these easy steps and get it done in no time.
Just in case you’re facing any issues other than this, don’t wait and call the customer care center right away. They’re always there to help and send over their technicians if needed.

Hi, This is George. Founder Of Vacuumist.com. Completed my graduation in Bachelor of Business Administration. Proud father of two lovely baby girls. Reviewing home appliances is my passion. Developing this blog to update and publish my recent reviews and research. Stay in touch.